The Ultrasonic Sensor is used to measure the distance with high accuracy and stable readings. It can measure the distance from 2cm to 400cm or from 1 inch to 13 feet. It emits an ultrasound wave at the frequency of 40KHz in the air and if the object will come in its way then it will bounce back to the sensor. By using that time which it takes to strike the object and comes back, you can calculate the distance.
The ultrasonic sensor has four pins. Two are VCC and GND which will be connected to the 5V and the GND of the Arduino while the other two pins are Trig and Echo pins which will be connected to any digital pins of the Arduino. The trig pin will send the signal and the Echo pin will be used to receive the signal. To generate an ultrasound signal, you will have to make the Trig pin high for about 10us which will send an 8 cycle sonic burst at the speed of sound and after striking the object, it will be received by the Echo pin.
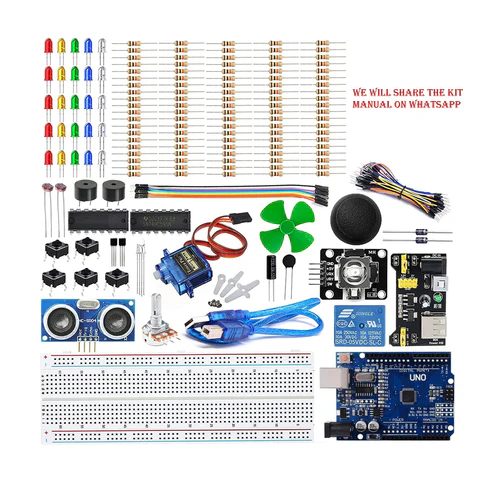
Further, check projects to properly understand the working of the Ultrasonic sensor and to measure the distance of any object using it.
The ESP8266 has 8 pins; the VCC and CH-PD will be connected to the 3.3V to enable the wifi. The TX and RX pins will be responsible for the communication of ESP8266 with the Arduino. The RX pin works on 3.3V so you will have to make a voltage divider for it as we made in our project.
First of all we will connect the ESP8266 with the Arduino. ESP8266 runs on 3.3V and if you will give it 5V from the Arduino then it won’t work properly and it may get damaged. Connect the VCC and the CH_PD to the 3.3V pin of Arduino. The RX pin of ESP8266 works on 3.3V and it will not communicate with the Arduino when we will connect it directly to the Arduino. So, we will have to make a voltage divider for it. Three 1k resistors connected in series will do the work for us. Connect the RX to the pin 11 of the Arduino through the resistors as shown in the figure below and also the TX of the Arduino to the pin 10 of the Arduino.
Now it’s time to connect the HC-SR04 ultrasonic sensor with the Arduino. Connections of the ultrasonic sensor with the Arduino are very simple. Connect the VCC and the ground of the ultrasonic sensor to the 5V and the ground of the Arduino. Then connect the TRIG and ECHO pin of the ultrasonic sensor to the pin 8 and 9 of the Arduino respectively.
#include <SoftwareSerial.h> // Library for software serial
#define DEBUG true
/* This will make the pin 10 of arduino as RX pin and pin 11 of arduino as the TX pin Which means that you have to connect the TX from the esp8266 to the pin 10 of arduino and the Rx from the esp to the pin 11 of the arduino*/
SoftwareSerial esp8266(10,11); // Pins for ESP8266
const int trigPin = 8; // Making the arduino’s pin 8 as the trig pin of ultrasonic sensor
const int echoPin = 9; // Making the arduino’s pin 9 as the echo pin of the ultrasonic
sensor
// defining two variable for measuring the distance
long duration;
int distance;
/* The setup() function is called when a sketch starts. It is used to initialize variables, pin modes, start using libraries, etc. This function will only run once, after each power up or reset of the Arduino board. */
void setup()
{
Serial.begin(115200); // Setting the baudrate
/* Set the baudrate according to you ESP’s baudrate. Your ESP’s baudrate might be different from mine */
esp8266.begin(115200);
pinMode(trigPin, OUTPUT); // Setting the trigPin as Output pin
pinMode(echoPin, INPUT); // Setting the echoPin as Input pin
sendData(“AT+RST\r\n“,2000,DEBUG); // command to reset the module
sendData(“AT+CWMODE=2\r\n“,1000,DEBUG); // This will configure the mode as
access point
sendData(“AT+CIFSR\r\n“,1000,DEBUG); // This command will get the ip address
sendData(“AT+CIPMUX=1\r\n“,1000,DEBUG); // This will configure the esp for multiple
connections
sendData(“AT+CIPSERVER=1,80\r\n“,1000,DEBUG); // This command will turn on the
server on port 80
}
/* This Particular Function is used for Repeated Execution of the Circuit until Specified. */
void loop()
{
digitalWrite(trigPin, LOW); // Making the trigpin as low
delayMicroseconds(2); // delay of 2us
digitalWrite(trigPin, HIGH); // making the trigpin high for 10us to send the signal
delayMicroseconds(10);
digitalWrite(trigPin, LOW);
duration = pulseIn(echoPin, HIGH); // reading the echopin which will tell us that how much
time the signal takes to come back
distance= duration*0.034/2; // Calculating the distance and storing in the distance
variable
if(esp8266.available()) // This command will that check if the esp is sending a
message
{
if(esp8266.find(“+IPD,”))
{
delay(1000);
/* We are subtracting 48 from the output because the read() function returns the ASCII
decimal value and the first decimal number which is 0 starts at 48*/
int connectionId = esp8266.read()–48;
String webpage = “<h1>IOT Garbage Monitoring System</h1>”;
webpage += “<p><h2>”; // Print the Message on the webpage
if (distance<5)
{
webpage+= ” Trash can is Full”; // Print the Message on webpage
}
Else
{
webpage+= ” Trash can is Empty”; // Print the Message on webpage
}
webpage += “</h2></p></body>”; // Construct webpage
String cipSend = “AT+CIPSEND=”;
cipSend += connectionId;
cipSend += “,”;
cipSend +=webpage.length();
cipSend +=“\r\n“;
sendData(cipSend,1000,DEBUG); // Send Data
sendData(webpage,1000,DEBUG); // Send Data to webpage
String closeCommand = “AT+CIPCLOSE=”;
closeCommand+=connectionId; // Close connection
closeCommand+=“\r\n“;
sendData(closeCommand,3000,DEBUG); // Send Data to close the command
}
}
}
String sendData(String command, const int timeout, boolean debug)
{
String response = “”; // Initialize response
esp8266.print(command); // Print the command
long int time = millis();
while( (time+timeout) > millis())
{
while(esp8266.available()) // Check if ESP is available
{
char c = esp8266.read(); // Read the values of ESP in c variable
response+=c; // Increase the value of c variable
}
}
if(debug)
{
Serial.print(response); // Print the Response
}
return response; // Return response
}
After uploading the code, open the Serial Monitor and it will show you an IP address as shown below.
Type this IP address in your browser, it will show you the output as shown below. You will have to refresh the page again if you want to see again that the trash can is empty or not.
So this how this Garbage Monitoring System works, this project can be further enhanced by adding few more features in it like we can set one more message when the Trash Can is half-filled or we can trigger an Email/SMS to alert the user when Trash Basket is full.
In this IOT Project, an Ultrasonic Sensor is used for detecting whether the trash can is filled with garbage or not. Here Ultrasonic Sensor is installed at the top of Trash Can and will measure the distance of garbage from the top of the Trash can and we can set a threshold value according to the size of the trash can. If the distance will be less than this threshold value, means that the Trash can is full of garbage and we will print the message “Basket is Full” on the webpage and if the distance will be more than this threshold value, then we will print the message “Basket is Empty”. Here we have set the Threshold value of 5cm in the Program code. We will use the ESP8266 Wi-Fi module for connecting the Arduino to the webserver. Here we have used Localwebserver to demonstrate the working of this Garbage Monitoring System.