Hardware Required
Introduction
In this project, we will know the basic functionality of passive buzzer as it can generate various tones such as ‘Happy Birthday’ or any particular tone.
HARDWARE REQUIRED
SOFTWARE REQUIRED
Arduino IDE 1.8.5 (programmable platform for Arduino)
Click To Download: https://www.arduino.cc/en/Main/Software
SPECIFICATIONS
Passive Buzzer Module
Arduino Passive Piezoelectric Buzzer Module can produce a range of sound tones depending on the input frequency. It consists of a passive piezoelectric buzzer, it can generate tones between 1.5 to 2.5 kHz by switching it on and off at different frequencies either using delays or PWM.
- Operating Voltage: 1.5~15V DC
- Tone Generation Range: 1.5~2.5kHz
- Dimensions: 18.5mm*15mm

Arduino Uno

CIRCUIT CONNECTION
- Connect GND of a buzzer with GND of Arduino Uno.
- Connect VCC of a buzzer with Pin 5V of Arduino Uno.
- Connect Pin Signal of a buzzer with Digital Pin 9 of Arduino Uno.

CODE
https://drive.google.com/open?id=10oXCCCh9EbD21TT2bo9fDn-sL9jf-2nI
int speakerPin = 9; //buzzer is connected to Pin 9 of the Board.
int length = 27; // the number of notes
char notes[] = “cdeeeeeeeeeeedef eeedddbdc “; // a space represents a rest
int beats[] = { 1, 1, 1, 1, 1, 1, 1, 1, 1, 1, 2, 1, 1, 1, 1, 1, 1, 2, 1, 1, 2, 1, 1, 1, 1, 2, 4 };//Duration of each note
int tempo = 300; //Change song speed here
void playTone(int tone, int duration) { //creating a square wave for the given duration
for (long i = 0; i < duration * 1000L; i += tone * 2) {
digitalWrite(speakerPin, HIGH);
delayMicroseconds(tone);
digitalWrite(speakerPin, LOW);
delayMicroseconds(tone);
}
}
void playNote(char note, int duration) { //Assigning high time for the notes
char names[] = { ‘c’, ‘d’, ‘e’, ‘f’, ‘g’, ‘a’, ‘b’, ‘C’ };
int tones[] = { 956, 851, 758, 716, 638, 568, 1014, 478 };
// play the tone corresponding to the note name
for (int i = 0; i < 8; i++) {
if (names[i] == note) {
playTone(tones[i], duration);
}
}
}
/* The setup() function is called when a sketch starts. It is used to initialize variables, pin modes, start using libraries, etc. This function will only run once, after each power up or reset of the Arduino board. */
void setup()
{
pinMode(speakerPin, OUTPUT); // Setting pin 9 as an OutPut Pin
}
/* The loop() function executes the program repeatedly until Specified. */
void loop()
{ //Main function
for (int i = 0; i < length; i++) { //For the length of the tune array
if (notes[i] == ‘ ‘) { //take space as rest
delay(beats[i] * tempo); // rest
} else
{
playNote(notes[i], beats[i] * tempo); //play the corresponding note for the corresponding beat
}
// pause between notes
delay(tempo / 2);
}
}
WORKING
Welcome to the Arduino Based Project which consists of Passive Buzzer. The basic working principle of Passive buzzer is being described here. A passive buzzer requires an AC signal to make a sound. It is like an electromagnetic speaker, where a changing input signal produces the sound, rather than producing a tone automatically.
Here, we have generated a tone from Passive buzzer. It can be done by PWM on the Arduino which can be used to control the pitch and the volume at the same time.
 Robokreeda BO Motors1 ×₹64.90


 Robokreeda USB Cables Micro USB - White1 ×₹35.40
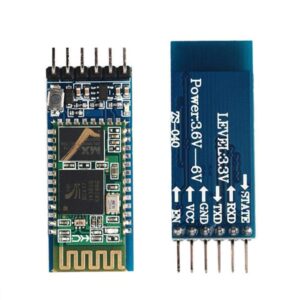 Robokreeda Bluetooth Module ( HC-05)1 ×₹265.50